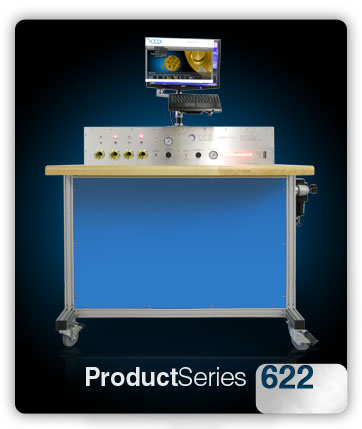
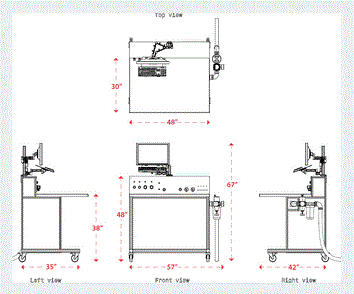
The Model 622 is identical in size to the Model 644 with 3 less sonic nozzles. It was designed for companies with a limited budget and smaller range of parts to measure Mass airflow and other related measurements on turbine engine parts.
Model 622 Mass Air Flow Test Machine NextGen

Model 622 Automatic Airflow Test Machine Stand with Four Configurations, 622LS, 622MS, 622HS, 622XHS
Flow Capabilities
- 0.000119 to 0.154153 Pounds per Second (Greater range with XH Series)
- 0.000189 to 0.244840 Flow Parameter
Specifications
- Automatic Operation, Pressure Control and Switching
- NIST Traceable Airflow Measurement
- High accuracy Mass flow measurement with uncertainties of up to 0.20%, with option to improve uncertainty to 0.16% using premium precision sensors
- ANSI/NCSL-Z540 Calibration
- GE, Pratt & Whitney, Honeywell, ABB, Rolls-Royce, Siemens
- 15 to 30 Seconds per Flow Test
- Manual/Automatic Operation
- 6 Internal Sonic Nozzles
- Automatic Single or Double Nozzle Select
- Part Test Profiles
- English and SI Units
- MS Windows Based Part Test Software
- QC Report, Label and Data Acquisition File
- Can also flow small Effective Flow Area measurements
- Data Acquisition File compatible with Excel
- Free Operator Training, Testing and Certification
- Shipping weight without crate is 350 lbs.
- Dual Monitor Display optional
- One Year Warranty on Parts and Labor
Options
- Additional Flow Ports B & E
- Low Pressure P3 0-2 PSIG (0-55 "H2O)
- Bar Code Reader
- Label Printer and Bar Code Software Output
- Printer
- Enhanced Report Software (8.5 x 11 or A4)
- Wireless Network Option
- Dew point Meter w/Warning
- Data Conversion
- Low Pressure Warning
- Lockout Box
- Statistical Software
- Networked Results Server
- Fixture Control Language, Send Commands to Tooling
- External Verification Master Nozzles
- Air Dryer Systems
- 300 - 500 Gal. Accumulator tanks sold in pairs
- Annual and Bi-Annual calibration packages
Disclaimer - Standard measurement uncertainty is up to 0.50% without lab calibrated nozzles. Measurement uncertainty may vary with flow, sensors used, calibration etc. Contact CCDI engineering to ensure best case uncertainty can be achieved for your test setup

